
bindaredondat
-
Content Count
391 -
Joined
-
Last visited
-
Days Won
25
Files posted by bindaredondat
-
ATV495X_WV_6.0
By bindaredondat in ATV 495X
Change Log:
1. The Status Bar has been removed. If you download something from your browser, check the "file manager" in the download section.
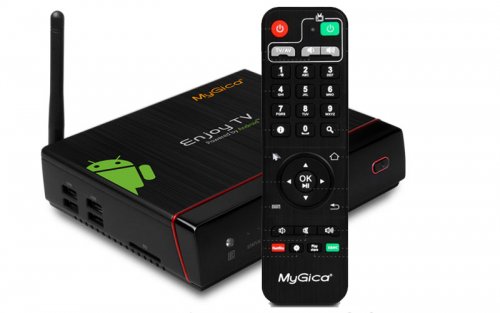
2. Added Google's Voice Search ability which allows you to use a microphone remote or webcam to use your voice in a variety of ways.
3. Updated various pre-installed APK's to their latest versions.
4. Fixed an issue where the box couldn't see certain 5GHZ WiFi connections.
5. Improved USB ATSC Tuner functionality and stability.
6. Fixed an instability issue with the search functions of the YouTube Android TV app.
How to process the steps:
1. Download the zip file
2. Unzip
3. Format your MicroSD Card to FAT32
4. Drag and drop files from Unzip folder to root of your MicroSD card
5. Hook it up to your ATV495X
6. Connect HDMI, turn TV on
7. Hold power button
8. Hookup power while holding down power
9. Hold for 15 seconds
10. Select (( Apply update from EXT ))
11. Update from sdcard if you have files on sd card or Udisk if you have it inside of USB.
you will see the android guy, give it 5 minutes and you're back to the main screen.
-----------------------------------------
We are excited to bring updates to your Mygica systems. Please follow the instructions closely and ensure that your unit matches the firmware you are installing. Please check your receipt to see that your unit is still within the 1-year warranty before doing a manual update. Mygica is not responsible for damage to the unit outside of the 1 year warranty period.
----------------------------------------
2,082 downloads
(0 reviews)0 comments
Updated
-
ATV495 MAX - Netflix HD Beta Image
By bindaredondat in Beta Files
1. Downloaded the file you need to unzip it,
2. Using a USB / MicroSD make sure it is formatted to FAT32
3. Drag and drop the Image file on the root of your USB/MicroSD.
4. Hook it up to your ATV495 Max
5. Using your remote on the screen scroll and select Update App
6. Scroll and click on Select.
7. Find your file and select it.
8. Select Update
9. Select Update again on the popup.
Leave it alone for 5 minutes till reboots and comes back to the main screen.
(( Note: You are responsible for any issues while processing this update if the file fails to load/ Dead device. ))
** There will be no upgrade or more work on this file **
2nd Note: The Update is only Netflix Beta App update and not full Firmware.
(( Our Phone support won't be able to help you step by step please view the video for help. ))
If you are having an issue with installation and app not showing, remember some little points.
When it rebooted did you see the installation black background? if not then follow these steps to help you.
1. Redownload the file make sure it is 100% done, Unzip and reformat your MiroSD or USB as FAT32.
2. Drag and drop your file back to the USB or MicroSD.
3. Try the video again and make sure you see the Black screen with roller update.
I am sure this time it will work.
6,339 downloads
(2 reviews)0 comments
Updated
-
ATV495 Pro AML File with USB Burner
By bindaredondat in ATV 495 / ATV 495PRO
Here is an AML file for reviving your ATV495 Pro,
Things you must know before applying this file to your ATV495 Pro,
1. This file is created only for ATV495 Pro and NOT for Models ( ATV495 / ATV495 Pro HDR / ATV495 X / ATV1900AC / ATV1900 Pro )
( you are responsible for any damages to any of your boxes )
- Only File for ATV495 Pro ** No more Development **
NOTE: Processing this Firmware upgrade will wipe all your Data
How to process the steps:
1. Download the zip file
2. Unzip
3. Install USB Burning Software on your Windows PC.
4. Click on file /
5. import Image and find your IMG file
And click on Open
5. Hook it up the USB male to male wire to your Computer
6. hold the power for 5 seconds to place your ATV495 Pro to recovery mode
Then Hookup the other side of the USB wire to your ATV495 Pro
** Reminder ** (( to hookup the USB wire to 2nd USB connection ))
7. Inside USB Buner application click on Start
It should change to
8. Now let the file load till it is 100% (( sometimes it will take up to 6 minutes for the file to be loaded ))
then you can hookup the USB from the box and hook it up to your TV via HDMI and Power and let it go through the first installation of preloaded apps.
please provide any feedback you may have, in the discussion area.
1,069 downloads
- atv495 pro 5.1 aml file
- usb burner
- (and 2 more)
Updated
-
ATV1960 7.1 ( 20180625 )
By bindaredondat in ATV 1960
Here is a factory file for ATV1960,
Change Log:
- Google Play store Error fixed.
- Some bug fixes.
NOTE: Processing this Firmware upgrade will wipe all your Data
How to process the steps:
1. Download the zip file
2. Unzip
3. Format your MicroSD Card to FAT32
4. Drag and drop files from Unzip folder to root of your MicroSD card
5. Hook it up to your ATV1960
6. Connect HDMI, turn the TV on
7. For Reset
a. ATV1960 Hold the Reset button at the back.
8. Hookup power while holding down Reset, via pin
9. Hold for 15 seconds
you will see the android guy, give it 5 minutes and you're back to the main screen.
please provide any feedback you may have, in the discussion area.
1,679 downloads
(0 reviews)0 comments
Updated
-
atv495 hdr os 7.1.2 update_MyGica_ATV495HDR_wv_7.1_20171221_V1.0
By bindaredondat in ATV 495Pro HDR
Change Log:
- Firmware upgrade OS 7.1.2
NOTE: Processing this Firmware upgrade will wipe all your Data
How to process the steps:
1. Download the zip file
2. Unzip
3. Format your MicroSD Card to FAT32
4. Drag and drop the file from Unzip folder to root of your MicroSD card
5. Hook it up to your ATV495 series unit
6. Connect HDMI, turn the TV on
7. Hold power button
8. Hookup the power cord while holding down the Power button
9. Still, hold on to the power button till you see the Recovery screen.
10. Using the remote select (( Apply update from EXT ))
11. Select "update from sd card" if your file is on microSD card
or Select " update from udisk " if your file is on USB
12. You will see the file img name( update_MyGica_ATV495Pro-HDR_wv_7.1_20171221_V1.0.img ) select it.
13. It will take 3 to 4 minutes to update then goes back to Recovery Screen, Select ( Reboot )
You will see the android guy, give it 5 minutes and you're back to the main screen.
NOTE: your Box will be reset to factory settings.
you will see the android guy, give it 5 minutes and you're back to the main screen.
please provide any feedback you may have, in the discussion area. (( http://mygicasupport.com/index.php?/forum/185-discussions/))
-----------------------------------------
We are excited to bring updates to your Mygica systems. Please follow the instructions closely and ensure that your unit matches the firmware you are installing. Please check your receipt to see that your unit is still within the 1-year warranty before doing a manual update. Mygica is not responsible for damage to the unit outside of the 1 year warranty period.
----------------------------------------
2,799 downloads
- mygica
- atv495 pro hdr
- (and 2 more)
-
MyGica_ATV585_600_5.1_20170612
By bindaredondat in Beta Files
Here is Beta Firmware to upgrade your ATV 585/600 to Android 5.1
You can install this normally using an SD Card or USB drive and the pre-installed upgrade app.
This does not require the reset button like before, however, if you would like to you can load this through the Recovery Menu as well.
Just extract the IMG file from the zip folder and move it to a USB drive or SD Card that is formatted to FAT32.
**PLEASE NOTE THIS WILL FACTORY RESET YOUR DEVICE**
- This is our MyGica version of Android 5.1 and not Android Stock version like we offered before.
This has been worked on for awhile now.
Change Logs:
1. Updated to KODI 17.3
2. Updated Google Play Services
3. Faster Performance
4. Fixed Mac Address changing
5. Turned off click sounds when browsing through the Home Screen + Android Settings
6. Fixed Screensaver issue when watching a video
7. Improved video playback
8. Improved standby issues as best we could. There is not much more we can do about this issue.
-----------------------------------------
Mygica is not responsible for damage to the unit outside of the 1 year warranty period.
----------------------------------------
11,412 downloads
- beta firmware
- atv585
- (and 3 more)
-

MyGica_1900AC/1800/582/380_Android_5.1_20170612
By bindaredondat in Beta Files
Here is the Beta Firmware to upgrade your ATV 1900AC/1800 series/582/380 to Android 5.1
You can install this using an SD Card or USB drive and the upgrade app listed in the settings area.
This does not require manually pressing the reset button.
Just extract the IMG file from the zip folder and move it to a USB drive or SD Card that is formatted to FAT32.
**PLEASE NOTE THIS WILL FACTORY RESET YOUR DEVICE**
Change Logs:
1. Updated to KODI 17.3
2. Updated Google Play Services
3. Faster Performance
4. Fixed Mac Address changing
5. Turned off click sounds when browsing through the Home Screen + Android Settings
6. Fixed Screensaver issue when watching a video
7. Improved video playback
8. Improved standby issues as best we could. There is not much more we can do about this issue
-----------------------------------------
Mygica is not responsible for damage to the unit outside of the 1 year warranty period.
----------------------------------------
8,595 downloads
- beta
- beta firmware
- (and 5 more)
-
update_MyGica_ATV495X_wv_7.1_20171221_V1.0
By bindaredondat in ATV 495X
Change Log:
- Firmware upgrade OS 7.1.2
NOTE: Processing this Firmware upgrade will wipe all your Data
How to process the steps:
1. Download the zip file
2. Unzip
3. Format your MicroSD Card / SDcard to FAT32
4. Drag and drop files from Unzip folder to root of your MicroSD card
5. Hook it up to your ATV329X or ATV195X
6. Connect HDMI, turn TV on
7. For Reset
a. ATV329X Front Power button hold it down.
b. ATV195X press a pin where Reset hole
8. Hookup power while holding down Reset, via pin
9. Hold for 15 seconds
10. Select (( Apply update from EXT ))
11. Update from Micro SDcard / SDcard if you have files on sd card or Udisk if you have it inside of USB.
you will see the android guy, give it 5 minutes and you're back to the main screen.
please provide any feedback you may have, in the discussion area. (( http://mygicasupport.com/index.php?/forum/186-discussions/ ))
-----------------------------------------
We are excited to bring updates to your Mygica systems. Please follow the instructions closely and ensure that your unit matches the firmware you are installing. Please check your receipt to see that your unit is still within the 1-year warranty before doing a manual update. Mygica is not responsible for damage to the unit outside of the 1 year warranty period.
----------------------------------------
4,871 downloads
(1 review)0 comments
Updated
-
MyGica_ATV495hdr_WV_6.0_20171114
By bindaredondat in ATV 495Pro HDR
Change Log:
1. The Status Bar has been removed. If you download something from your browser, check the "file manager" in the download section.
2. Added Google's Voice Search ability which allows you to use a microphone remote or webcam to use your voice in a variety of ways.
3. Updated various pre-installed APK's to their latest versions.
4. Fixed an issue where the box couldn't see certain 5GHZ WiFi connections.
5. Improved USB ATSC Tuner functionality and stability.
6. Fixed an instability issue with the search functions of the YouTube Android TV app.
How to process the steps:
1. Download the zip file
2. Unzip
3. Format your MicroSD Card to FAT32
4. Drag and drop files from Unzip folder to root of your MicroSD card
5. Hook it up to your ATV495Pro HDR
6. Connect HDMI, turn TV on
7. Hold pin where Reset is
8. Hookup power while holding down Reset, via pin
9. Hold for 15 seconds
10. Select (( Apply update from EXT ))
11. Update from sdcard if you have files on sd card or Udisk if you have it inside of USB.
you will see the android guy, give it 5 minutes and you're back to the main screen.
-----------------------------------------
We are excited to bring updates to your Mygica systems. Please follow the instructions closely and ensure that your unit matches the firmware you are installing. Please check your receipt to see that your unit is still within the 1-year warranty before doing a manual update. Mygica is not responsible for damage to the unit outside of the 1 year warranty period.
----------------------------------------
805 downloads
- nov 2017 update
- os 6.0
- (and 3 more)
(0 reviews)0 comments
Updated
-
ATV1800E-Factory-Files.zip
By bindaredondat in ATV 1800E
Changelog;
1. Updated kodi to 16.0
2. solved Wifi disconnect issue
3. CVBS default output change to 480i (NTSC)
How to process the steps:
1. Download the file
2. Unzip
3. Format your MicroSD Card to FAT32
4. Drag and drop files from Unzip folder to root of your MicroSD card
5. Hook it up to your ATV1800E
6. Connect HDMI, turn TV on
7. Hold pin where Reset is
8. Hookup power while holding down Reset, via pin
9. Hold for 15 seconds
you will see the android guy, give it 5 minutes and your back to the main screen.
NOTE: your Box will be reset to factory,
20,051 downloads
Updated
-
ATV582-Factory-Files.zip
By bindaredondat in ATV 582 / ATV 380
Changelog;
1. Updated kodi to 16.0
2. solved Wifi disconnect issue
3. CVBS default output change to 480i (NTSC)
How to process the steps:
1. Download the file
2. Unzip
3. Format your MicroSD Card to FAT32
4. Drag and drop files from Unzip folder to root of your MicroSD card
5. Hook it up to your ATV1800E
6. Connect HDMI, turn TV on
7. Hold pin where Reset is
8. Hookup power while holding down Reset, via pin
9. Hold for 15 seconds
you will see the android guy, give it 5 minutes and your back to the main screen.
NOTE: your Box will be reset to factory,
5,440 downloads
- atv582
- factory file
- (and 1 more)
Updated
-
Updated
-
ATV1200-KR34-Factory-Files.zip
By bindaredondat in ATV 1200
Changelog:
1. Updated MyGica Launcher to KODI
2. Added KODI 14.1 MyGica Edition pre-installed
3. Added latest new version of the MyGica Store
4. More Webcam Support
5. Fixed few other minor bugs
How to process the steps:
1. Download the file
2. Unzip
3. Format your SD Card to FAT32
4. Drag and drop files from Unzip folder to root of your SD card
5. Hook it up to your ATV1800E
6. Connect HDMI, turn TV on
7. Hold pin where Reset is
8. Hookup power while holding down Reset, via pin
9. Hold for 15 seconds
you will see the android guy, give it 5 minutes and your back to the main screen.
NOTE: your Box will be reset to factory,
6,506 downloads
Updated
-
ATV1200-KR60-Factory-File.zip
By bindaredondat in ATV 1200
Changelog:
1. Updated MyGica Launcher to KODI
2. Updated XBMC Button on KR60 to KODI
3. Added KODI 14.1 MyGica Edition pre-installed
4. Added latest new version of the MyGica Store
5. More Webcam Support
6. Fixed few other minor bugs
7. Added KR20 Remote Support to this firmware. A picture of this new remote is attached.
How to process the steps:
1. Download the file
2. Unzip
3. Format yourSD Card to FAT32
4. Drag and drop files from Unzip folder to root of your SD card
5. Hook it up to your ATV1800E
6. Connect HDMI, turn TV on
7. Hold pin where Reset is
8. Hookup power while holding down Reset, via pin
9. Hold for 15 seconds
you will see the android guy, give it 5 minutes and your back to the main screen.
NOTE: your Box will be reset to factory,
21,189 downloads
Updated
-
ATV1800E WiFi Fix.zip
By bindaredondat in ATV 1800E
What was fixed:
Changelog;
1. Updated kodi to 16.0
2. solved Wifi disconnect issue
3. CVBS default output change to 480i (NTSC)
How to process the steps:
1. Download the file
2. Unzip
3. Format your SD Card to FAT32
4. Drag and drop files from Unzip folder to root of your SD card
5. Hook it up to your ATV1800E
6. Connect HDMI, turn TV on
7. Hold pin where Reset is
8. Hookup power while holding down Reset, via pin
9. Hold for 15 seconds
you will see the android guy, give it 5 minutes and your back to the main screen.
NOTE: your Box will be reset to factory,
1,232 downloads
0 comments
Updated
-
ATV586-Factory-Restore.zip
By bindaredondat in ATV 586
Changelog:
1. Updated to new Android Kernel
2. Fixed Full-screen PIP on the main launcher
3. Faster Channel Change
4. Corrected remote buttons for Ch UP/DOWN
5. Fixed Audio out of Sync
6. Added KODI 16.0
How to process the steps:
1. Download the file
2. Unzip
3. Format your MicroSD Card to FAT32
4. Drag and drop files from Unzip folder to root of your MicroSD card
5. Hook it up to your ATV1800E
6. Connect HDMI, turn TV on
7. Hold pin where Reset is
8. Hookup power while holding down Reset, via pin
9. Hold for 15 seconds
you will see the android guy, give it 5 minutes and your back to the main screen.
NOTE: your Box will be reset to factory,
813 downloads
Updated
-

ATV600-Factory-Restore.zip
By bindaredondat in ATV 585 / ATV 600
Changelog:
1. New Android SDK + Kernel from AMLogic
2. Added KODI 14.1 MyGica Edition
3. Added New MyGica Store
4. Removed Nexus Launcher, only MyGica Launcher now. (We found this confused customers big time)
5. Faster Performance and Stability
6. Added DTS Sound Support
7. Updated Internal Video Player Codecs
8. MyGica Settings Launcher icons are more legible
9. Updated Ethernet Performance. Full Speed now
10. Updated Wifi Performance. (Will be more changes to this in next update to follow)
11. Added Mag TV - Mag 250/254 Emulator Support
12. Added feature where you hold down 3 lined context menu button and it will kill all open apps
13. Added Google TV Remote Support
14. Added KR301 Remote Support
15. Added KR40 Remote Support
Other changes and fixes:
1.Improved system stability.
3.Fixed video frame loss issue.
4.Fixed some HD videos can not be played smoothly problem.
5.Fixed audio and image, not sync while playing MPEG2 videos.
6.Fixed no image while playing local videos with XBMC.
7.Fixed the device crash while playing some ts, H265 files(seek) for a long time.
8.Fixed HTML5 can not be played with the normal window.
9.Decreased channel switched time of streaming .
10.Fixed some apps can not get software keyboard.
11.Fixed Ethernet can not get IP sometimes.
12.Fixed some bugs related with VPN.
13.Increased fps refresh rate to make some apps run smoothly.
14.Update DLNA and Airplay app fixed several bugs.
15.Fixed CVBS display problems.
16.Fixed other bugs.
How to process the steps:
1. Download the file
2. Unzip
3. Format your MicroSD Card to FAT32
4. Drag and drop files from Unzip folder to root of your MicroSD card
5. Hook it up to your ATV1800E
6. Connect HDMI, turn TV on
7. Hold pin where Reset is
8. Hookup power while holding down Reset, via pin
9. Hold for 15 seconds
you will see the android guy, give it 5 minutes and your back to the main screen.
NOTE: your Box will be reset to factory,
727 downloads
Updated
-
ATV585-Factory-Restore.zip
By bindaredondat in ATV 585 / ATV 600
Changelog:
1. New Android SDK + Kernel from AMLogic
2. Added KODI 14.1 MyGica Edition
3. Added New MyGica Store
4. Removed Nexus Launcher, only MyGica Launcher now. (We found this confused customers big time)
5. Faster Performance and Stability
6. Added DTS Sound Support
7. Updated Internal Video Player Codecs
8. MyGica Settings Launcher icons are more legible
9. Updated Ethernet Performance. Full Speed now
10. Updated Wifi Performance. (Will be more changes to this in next update to follow)
11. Added Mag TV - Mag 250/254 Emulator Support
12. Added feature where you hold down 3 lined context menu button and it will kill all open apps
13. Added Google TV Remote Support
14. Added KR301 Remote Support
15. Added KR40 Remote Support
Other changes and fixes:
1.Improved system stability.
3.Fixed video frame loss issue.
4.Fixed some HD videos can not be played smoothly problem.
5.Fixed audio and image, not sync while playing MPEG2 videos.
6.Fixed no image while playing local videos with XBMC.
7.Fixed the device crash while playing some ts, H265 files(seek) for a long time.
8.Fixed HTML5 can not be played with the normal window.
9.Decreased channel switched time of streaming .
10.Fixed some apps can not get software keyboard.
11.Fixed Ethernet can not get IP sometimes.
12.Fixed some bugs related with VPN.
13.Increased fps refresh rate to make some apps run smoothly.
14.Update DLNA and Airplay app fixed several bugs.
15.Fixed CVBS display problems.
16.Fixed other bugs.
How to process the steps:
1. Download the file
2. Unzip
3. Format your MicroSD Card to FAT32
4. Drag and drop files from Unzip folder to root of your MicroSD card
5. Hook it up to your ATV1800E
6. Connect HDMI, turn TV on
7. Hold pin where Reset is
8. Hookup power while holding down Reset, via pin
9. Hold for 15 seconds
you will see the android guy, give it 5 minutes and your back to the main screen.
NOTE: your Box will be reset to factory,
21,446 downloads
Updated
-
ATV380 Factory Files.zip
By bindaredondat in ATV 582 / ATV 380
Changelog;
1. Updated kodi to 16.0
2. solved Wifi disconnect issue
3. CVBS default output change to 480i (NTSC)
How to process the steps:
1. Download the file
2. Unzip
3. Format your MicroSD Card to FAT32
4. Drag and drop files from Unzip folder to root of your MicroSD card
5. Hook it up to your ATV1800E
6. Connect HDMI, turn TV on
7. Hold pin where Reset is
8. Hookup power while holding down Reset, via pin
9. Hold for 15 seconds
you will see the android guy, give it 5 minutes and your back to the main screen.
NOTE: your Box will be reset to factory,
952 downloads
0 comments
Updated
-
ATV520E-Factory-Files.zip
By bindaredondat in ATV 520E
Changelog:
- Added Miracast (Please note this works on all makes and models which support miracast, except Samsung right now, due to Samsung requiring an HDCP Key for miracast, which requires a hardware chip to be in the box for HDCP)
- Improved DLNA support for Android, Windows and MAC OSX Devices. This can be activated within the new Media Center App
- Improved Android OS is Faster and more stable performance
- Removed some pre-installed apps, which are not needed
- More available memory after the upgrade
- Auto Detect for resolution on HDMI and RCA outputs. (Please note Component Video no longer works on this upgrade)
- Improved XBMC faster and more stable performance
- Fixed XBMC Add-on shortcuts disappearing
- Fixed XBMC keyboard functions when using an external USB keyboard, you can now use all keyboard buttons on a keyboard remote
- Fixed XBMC display 4:3 videos as 16:9 always
- Fixed Gmail app not syncing Gmail contacts
- Upgraded Netflix APP to better support IR remotes
- Holding down the Power Button on your Remote Control will now allow you to select "STANDBY MODE" or "REBOOT"
- Added second launcher (Official Android)
How to process the steps:
1. Unzip the file
2. Format your MicroSD to FAT32
3. Drag and drop all the files from inside zip to root of your MicroSD card
4. hook up it to your ATV520E
5. Make sure your HDMI is connected
6. hold a pin to reset, at the bottom of the unit
7. while holding the reset, hook up the power and hold for 15seconds
8. you will see the android guy, and give it 2 minutes
your box will boot back to Normal,
NOTE: processing this will wipe your device
35,690 downloads
Updated
-

ATV500X-File-PiVOS.zip
By bindaredondat in ATV 500X
This file will update your ATV500X to Linux Based Kodi 14.0
Not Official File by MyGica
How to process the steps:
1. Download the file
2. Unzip
3. Format your MicroSD Card to FAT32
4. Drag and drop files from Unzip folder to root of your MicroSD card
5. Hook it up to your ATV1800E
6. Connect HDMI, turn TV on
7. Hold pin where Reset is
8. Hookup power while holding down Reset, via pin
9. Hold for 15 seconds
you will see the android guy, give it 5 minutes and your back to the main screen.
NOTE: your Box will be reset to factory,
Video show you how to install step by step
28,777 downloads
0 comments
Updated